Turning reference pictures into a useful mesh
Reference roles, consistent views, reconstruction and texture preparation for characters that must work beyond one camera.
Part 2 of 9From images to expressive 3D charactersSeries contents
- Building an expressive Giant Aperture mascot
- Turning reference pictures into a useful mesh
- Giving a mesh meaningful part labels
- Making painted eyes look and move like eyes
- Finding an ear and making it bend
- Turning a mouth line into an opening
- Fitting movement to the body in front of us
- Composing expressions and character behaviour
- Gaze, breathing and character behaviour
Decide what each reference owns
A reconstruction model can make a plausible object while missing the character. Before asking for geometry, we need to decide what the pictures are supposed to establish. A maquette can own pose and proportions. A style reference can own appearance. A selected character picture can carry identity. Those roles need to survive into the request record.
This matters when the inputs disagree. A style picture should not silently replace the selected pose, and an attractive older output should not become a reference simply because it is easy to find. The shared character vocabulary and prompt compiler keep the intended body and artist instructions together.
A beautiful three-quarter image is useful for judging character, but it does not describe a profile or a back. Hidden surfaces still need to be proposed, checked and accepted. Recording the actual admitted pictures makes that uncertainty visible.
Make the views describe the same body
The documented character route uses a four-view pack before reconstruction. Consistent framing, orientation, proportions and feature placement are the practical requirement. If an ear changes size between views, the model has conflicting evidence about the thing we want it to build.
Background removal is part of that preparation. So are the facing direction and the space around thin parts. A stem-like antenna or a floppy ear must remain visible rather than disappear into another limb or merge with the background.
The recorded October character direction uses Hunyuan3D-2mv for geometry and MV-Adapter for texture. Those are selected tools in this route, not a claim that one model is best for every object. Compact props and thin branching shapes can need different reconstruction choices.
- References
Record identity, pose, proportions and appearance roles.
- View pack
Check that the admitted views agree on the body.
- Geometry
Inspect silhouette, attachments and hidden surfaces.
- Texture
Inspect paint separately from the scene lighting.
The neutral mesh can already contain an expression
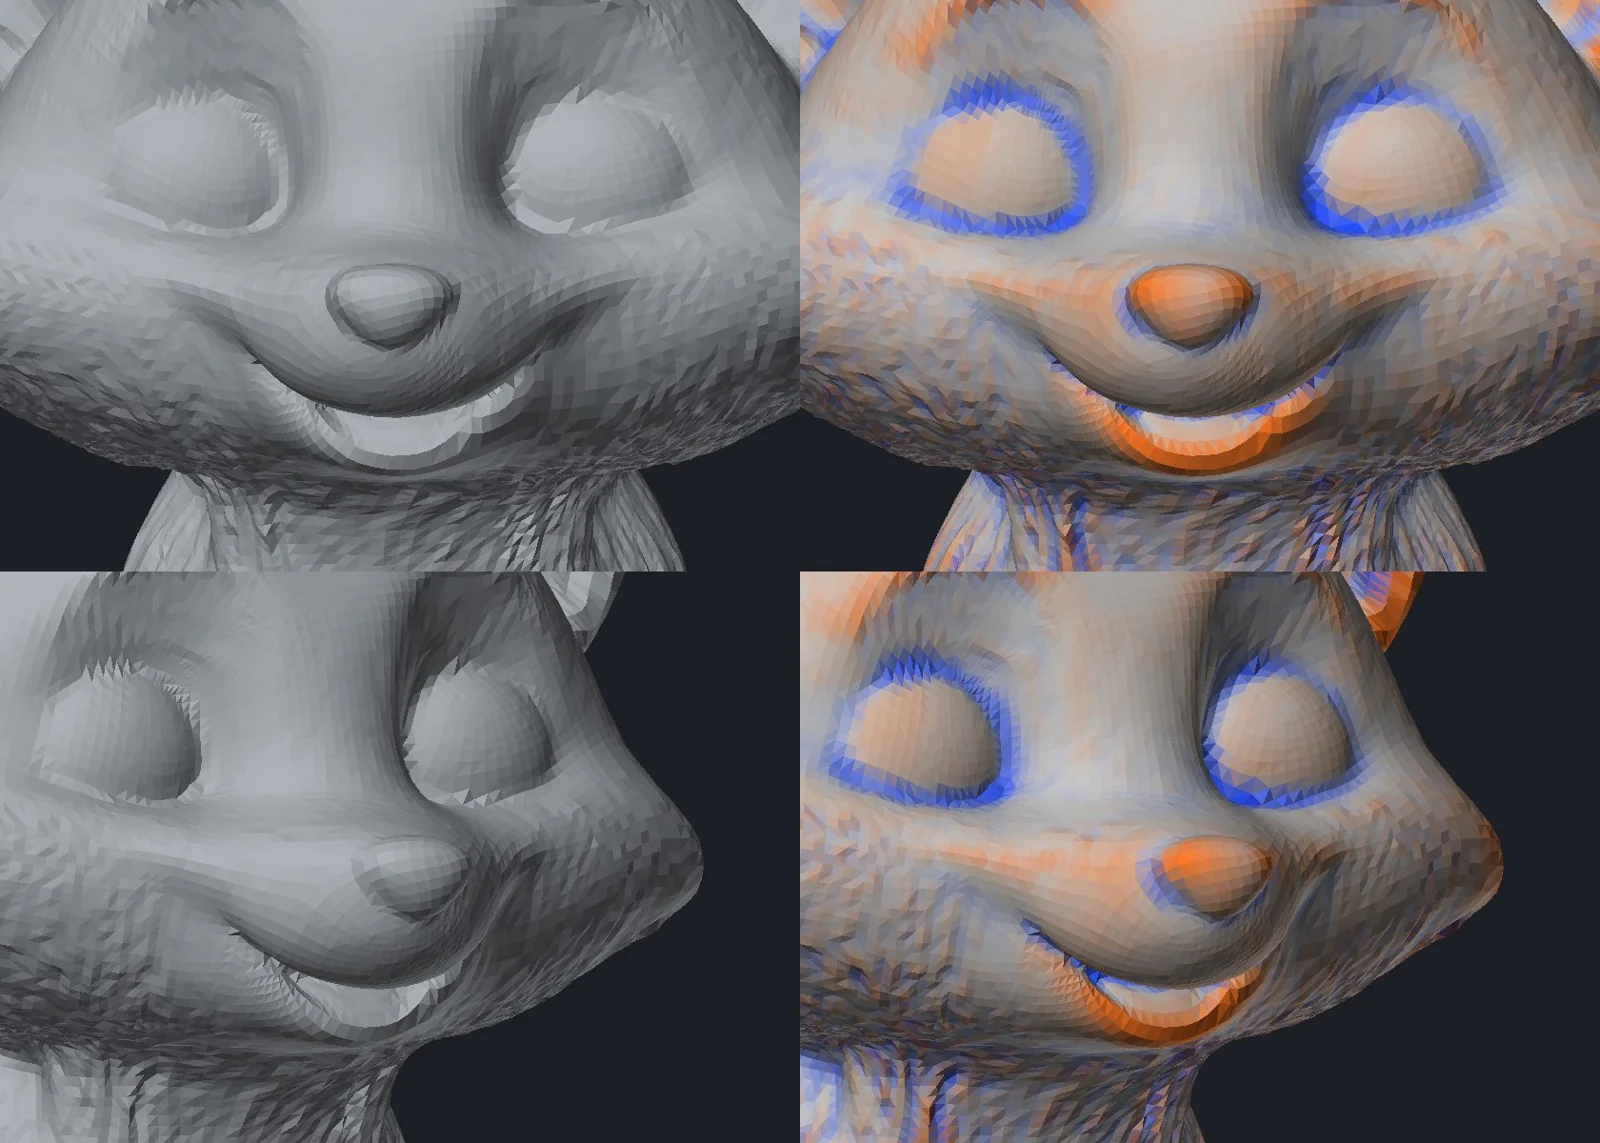
The fox mouth study is a useful warning. Its source picture had an open smile, and the reconstructed mesh carried that smile as sculpture: a raised lip crease above a recessed crescent. Calling that object “neutral” did not close the mouth or remove the smile.
That changes the next problem. A rig cannot assume that opening a jaw from rest is the same task on a closed muzzle and an already open crescent. The saved mouth line, opening span and interior need to be assessed on the actual surface.
A clay view and an angled view reveal this much more clearly than a flattering textured render. The point of the comparison is to discover what geometry the next stage receives, including an expression we may have accidentally baked into it.
Separate colour from lighting
Texture preparation has a similar trap. A generated highlight or dark shadow can look convincing in the reference lighting, then remain painted in place when the character moves. The material ends up carrying a second, incompatible lighting setup.
The character direction therefore includes checking the colour map for baked shadows and reducing them before look development. Eye work has a particularly visible version of the problem: a painted catchlight needs to be separated from the highlight produced by the live renderer.
Geometry, paint, part labels and the viewer must refer to the same asset lineage. A good picture of an earlier version is useful history; it is not evidence that the later reconstructed body has the same silhouette or features. This chapter describes the preparation method, rather than presenting a mixed set of builds as one completed turnaround.
Keep the decisions small and reversible
Choosing a reference set should be a high-impact act of art direction. It establishes the character we intend to preserve. Orientation checks, background preparation, file lineage and repeatable reconstruction settings are mechanical work the tools should carry.
The limits remain visible: missing views leave uncertainty, very thin or fused parts can reconstruct poorly, and a successful model run does not prove that the mesh will label, deform or shade well. The next step is to identify the useful parts of the surface we actually obtained.